DISCLAIMER - I'm not responsible if you break stuff. Read at your own risk.
I had a lot of "fun" the other day with OpenVAS.
If you're not aware, OpenVAS is a free, open source vulnerability scanning tool.
You may be familiar with commercial scanners (Qualys, Nessus, Retina, Nexpose...)
OpenVAS comes on Kali, and you can get the appliance and/or enterprise support from Greenbone. You can also install from the source code, or from packages for Linux flavors (Kali, Ubuntu, RHEL/Centos/Fedora).
I have also noticed that while the Greenbone appliance is very well documented, installing from the packages is not quite so. OpenVAS 9 was released earlier this year, so the documentation for Greenbone's 4.0 version of the appliance is still in "draft".
I needed LDAP support for centralized authentication & the community Greenbone appliance was not compiled with LDAP support (obviously, an enterprise would want that support, right? Which means pay for the enterprise appliance! I see what they did there).
Anyhoo.
I decided to install OpenVAS 9 on CentOS 7.
Hooking into LDAP and getting my domain certs in the appliance web application was a doozy. I mean, it took a couple days, but still. The appliance documentation makes it look easy, when the package installation is a bit different (did I mention it's like the wild west on the lack of documentation?).
Note: I'm using an Active Directory CA.
I followed this guide for my install. No problems.
1. Set up LDAP configuration in OpenVAS
Configure LDAP settings: Under administration, go to LDAP.
Under host, ensure you type the common name of your CA in the hostname. If it doesn't match Openvas won't communicate with LDAP!! When you view /var/log/openvas/openvasmd.log, it will NOT tell you this! You will see a bunch of "couldn't contact the LDAP server" errors. (which you can test that with openldap's ldapsearch, to determine this is literally just an openvas problem). Follow the Greenbone guides for the other fields... I used %s@domain for user accounts.
Pull the CA certificate (base 64) from your local domain https://adserver/certsrv
Upload the cert to the LDAP settings. It will register and you should see your info populate.
2. Create users
and make sure you click the checkbox for LDAP.
Now, for the SSL certs......... This is super simple with the appliance! but without it --- eeeee_eee. I couldn't find much on documentation at all. And that's why you get this lovely blog.
It comes with self-signed certs with the install, but I wanted a trusted cert for my domain.
1. Create your certs
openvas has a command called openvas-mkcert, which as it turns out is depreciated in v9.
openvas-manage-certs, is the new command. Buuut I figured it was easier to do it with openssl.
I used openssl, but in order to add subjectAltNames I had to modify openssl.cnf
nano /etc/pki/tls/openssl.cnf
under the [req] header,
uncomment
#req_extensions = v3_req
and then added the following on the line below the [v3_req] header
subjectAltName=IP:10.0.0.3,DNS:openvas.domain
You do not need to include the port, for openvas its like 9392 or something. but not necessary in the cert. (in case you were wondering).
Get private key:
openssl genrsa -out private.key
Once you have the private key, generate your CSR.
openssl req -new -key private.key -out server.csr
Copypasta the .csr (cat it) and then paste it into the create request field of your CA, and make sure you select web server cert!
Now download the base64 encoded certificate. It will be something like, yournewcert.cer
You can copypasta back to your putty window, scp, whatever.
Now you have your private AND public keys! yay! HTTPS might happen without Chrome bitching about it... eh not so fast.
I just took for granted that something like this would be running on an open source web platform, like nginx or httpd (apache). I was surprised to find out that it wasn't. I couldn't put my certs in those places. I did a little digging. I found out that the webserver is hardcoded in the openvas application (I creeped on some source code from greenbone's website). I noticed here that libmicrohttpd was listed as a "prerequisite". It was like verification that all my worst fears came to life.
LOL, maybe I'm exaggerating. Anyway, I went to check out this libicrohttpd to see more about how terrible this was going to be, and how to get HTTPS working with it. From what I read, you had to point the source code to the certificates. So, somewhere in openvas, the self signed certificates had a specific location and a specific name to be referenced by the code. For hints about the name, I recalled the greenbone instructions for certs, which state they use base64 encoded .pem files.
Since this is linux, I just did a find command to see where the .pem files lived on this machine.
find / -name *pem
which turned up with:
/var/lib/openvas/CA/servercert.pem
/var/lib/openvas/private/CA/serverkey.pem
Then, I was like DUH. /var/lib/openvas. microhttpd is a library in C, which uses a hardcoded path to certs. it makes sense they put them here.
2. Move your Certs to the right places!
So, you want to move the current servercert.pem & serverkey.pem.
mv /var/lib/openvas/CA/servercert.pem /var/lib/openvas/CA/servercert.pem.old
mv /var/lib/openvas/private/CA/serverkey.pem /var/lib/openvas/private/CA/serverkey.pem.old
and then copy the newly created certs to the old location, with the SAME name as the ones that just moved. I copied them just to make sure I had the originals if I messed up typing somewhere. You can mv these, if you want. I just rm'd them after I verified everything was working.
cp /path/to/the/server.cer /var/lib/openvas/CA/servercert.pem
cp /path/to/the/private.key /var/lib/openvas/private/CA/serverkey.pem
3. Reboot!
shutdown -r
and then wait for it to come back up with your shiny new, trusted certs. (:
Something you may also want to check is permissions on your directories with your keys. - Make sure they're not world-readable/writable.
annd that's it. Not so bad when you're not digging for answers. hahaha
-m.
Wednesday, November 15, 2017
Thursday, October 26, 2017
Hey Everyone,
This is turning into an annual blog, it seems. Sorry about that.
I started an LLC earlier this year with intentions to aim towards mobile app & web development and security consulting... I don't have the website up yet, unfortunately. Too busy with other things.
The LLC process is fairly painless in my state, about 52$ and 15 minutes later, I had an EIN & LLC. I then got a business bank account with checking and a credit card. If you've ever thought about it, just take the plunge and got for it. Tax write-offs for company related items (hardware, training, etc) will help you get everything you need together to start earning money.
I got my CISSP last week and I recently had the opportunity to attend the CompTIA workshop for their new certification, Pentester+. Look to those objectives being published within the next two weeks! The event was great, the staff was great, and the opportunity was once in a lifetime. If you get the chance to be one of their SME's definitely do it.
I am currently working on setting up my "laboratory" (for my LLC) in my office. I purchased two 34" curved monitors and a refurbished Dell R610. I'm going to need some more hard drives and RAM for it, eventually. I went through quite a bit of troubleshooting to enable a setting in the BIOS that allowed me to boot from the DVD drive (it was not blatantly obvious, like most things in IT). I'm going to get Ubuntu running on it with DevStack to have my own personal cloud (I really just need a Lakitu sticker for it now). With that there will be some solid lab setups for sharpening my offensive security as well as dev skills. (My initial attempt to install it, I forgot to configure the RAID controller, first derp... and I also have an ugly, long Cat5e ran across the length of my house to the router)
I'll blog about these adventures, someone might find them helpful... don't worry (:
I've also spent some time tinkering in AWS, so good so far. I've gotten some Udemy training for AWS from "A Cloud Guru" and it's one of the best online trainings I've ran into by far.
I've been spending a lot of time at the Midwest Cyber Center (a really, really amazing non-profit), as a technical mentor, helping them prepare students for the Cyber Patriot program. As well as I went to the Microsoft "Digi-Girls" event, which encourages middle and high school girls to get involved with STEM fields. I told a girl she could get paid to find security flaws in websites and programs, and she was SO excited. Made my day. I also talked to some who were going to the event to get out of class, and had no real interest in STEM careers. They asked me how much I paid for my half sleeve tattoo, and I told them it was probably around $1200. They flipped out, and I told them if they had a STEM job, they too could spend lots of money on tattoos. I think I got their attention. Job well done, it seems.
I also started writing a presentation on buffer overflows (stack & heap) with an accompanying lab... When I have time, I'll touch it up and post it here for everyone.
I also read about the recent Blueborne attack vector & Corresponding exploits. Armis Labs has created one of the most well-written white papers I have ever seen. They color coded lines of code and wrote easy to understand explanation and details. The TLDR version is that there was a lack of input validation on the header files in the C programming language, affecting the implementation of bluetooth across all devices that shared the library. The scariest part, was that this vulnerability occurred during the handshake process (before you paired your device), and allowed for a buffer overflow which was leveraged for remote code execution. They took the moral high ground and disclosed it to vendors, allowing them time to patch before it was publicized.
Aside from IT things, I'll be attending Ford's Adrenaline Academy for their Ford Focus RS rally school soon.
Sorry, the last two posts have been rants of little to no real technical value. Just busy.
Wednesday, August 24, 2016
Hey Everyone!
I've been busy doing nothing. loss of motivation for a few wasted months while dealing with moving, divorce, and coming home from a deployment... oh and I saw Harry Potter world in Universal, went to Disney World, and took my Grandma to Ireland!!!!!!! Ireland was amazing. I cannot wait to travel more! I also have a half sleeve tattoo! I never pictured that happening ten years ago. It's about 90% done, and will finish up in a few days.
I'll be taking an intro to OS course, I'm hoping it helps refresh me on C, and I can build off the kernel dev concepts I worked with in a previous blog post. I am hoping to complete the degree itself in 2.5 or 3 years... Starting out with one course this semester to get the hang of things again. I need to take ten courses to finish... and I plan on taking courses during the summers. Trying to figure out what to specialize in, but I have a little time before then.
I still wanna meet Linus Torvalds someday. I was saddened to hear about Ian Murdock's passing....
I've been busy doing nothing. loss of motivation for a few wasted months while dealing with moving, divorce, and coming home from a deployment... oh and I saw Harry Potter world in Universal, went to Disney World, and took my Grandma to Ireland!!!!!!! Ireland was amazing. I cannot wait to travel more! I also have a half sleeve tattoo! I never pictured that happening ten years ago. It's about 90% done, and will finish up in a few days.
Anyway, back on track. Started Grad school!
I'm in Gerogia Tech's OMSCS program! I'm excited to start and also super nervous.
I'm in Gerogia Tech's OMSCS program! I'm excited to start and also super nervous.
I'll be taking an intro to OS course, I'm hoping it helps refresh me on C, and I can build off the kernel dev concepts I worked with in a previous blog post. I am hoping to complete the degree itself in 2.5 or 3 years... Starting out with one course this semester to get the hang of things again. I need to take ten courses to finish... and I plan on taking courses during the summers. Trying to figure out what to specialize in, but I have a little time before then.
(I am the absolute worst, btw. I had plans for other blog posts and totally got laaazy. I can't believe how long it has been since I've updated this.)
Sine then I got some cool new books to read, too. I found a kernel dev book by Robert Love, and some really neat books on writing great code by Randall Hyde.
I still wanna meet Linus Torvalds someday. I was saddened to hear about Ian Murdock's passing....
Anyway. I love cats.
End 2 AM rant.
Monday, November 16, 2015
Compiling my first kernel!
"There are neither beginnings or endings to the turning of the Wheel of Time. But it was a beginning" - Robert Jordan, Wheel of Time.
***THE AUTO GENERATED HTML CODE FOR THIS BLOG REALLY SUCKS AND I'M TOO LAZY TO FIX THE DISASTER!***
Intro
In the beginning, you just compile a kernel that prints text to the screen. You go back and make it more complex with later steps. Ideally, this is a good practice because it will be easier to troubleshoot if you can verify everything functional to a certain point. This very beginning step includes the Kernel entry point, main.c, and screen.c.
I have never compiled a kernel myself, my background has some linux administration, and a course of C programming in college (although I should note that I had a solid 107% in that class).
I thought it was best to use "training wheels" on my first kernel and follow a guide. I opted for Brandon Friesen's: "Brans Kernel Development 1.0". It's a little dated, although I still seem to think 2005 was like last year... obviously not.
This blog is not a remake of the guide, and does not contain the instructions that the guide does, so it is optimal to follow along with Mr. Friesen's guide in another tab.... Actually, for the version in my blog,
Edit: it'd be most optimal to use this guide: http://www.cs.vu.nl/~herbertb/misc/writingkernels.txt
Later on when troubleshooting the kernel, in attempts to get it booted, I used this guide and checked/modified some of my code against his.
What I'm doing in my blog is noting some of the slight differences I had. He assumes you're using a Windows environment, and I am attempting to do all of it in my trusty 64 bit Ubuntu 14.04 LTS, running as a VM in virtualbox. I should also note that due to the time of writing, it can be implied that Brandon Friesen's host is using a 32 bit Windows environment (I learned this the hard way, though).
Prep
*Note that if you are using Virtual Box, you will have to install guest additions to get your Ubuntu 14.04 screen display to work correctly.In preparation for this, I created a directory (mkdir) inside my home directory in Ubuntu to put all things related to the kernel dev, and called it "kernel". I used nano for my text editor, but you are welcome to use whichever flavor you want. My goal is to get the kernel compiled and have the ability to boot to it with qemu inside of my Ubuntu VM. Most of these you can install, or will already have on Ubuntu. Ubuntu uses the apt-get package manager, so you can install packages like below:
sudo apt-get install nasm qemu gcc mtools
Kernel Entry Point
very first piece of code that will run following the boot loader.
It will setup the stack, GDT (Global Descriptor Table), IDT
(Interrupt Descriptor Table), and segment registers (more
about these to follow, but they won't be modified yet). In most
kernels, the assembler code is all in one file, and the rest of
the files are written in C.
My start.asm had to be modified from Mr. Friesen's because the second guide I used actually
had this file as an ELF instead of an aout. This removes the kludge and a few other pieces.
My start.asm:
[BITS 32]
global start
start:
mov esp, _sys_stack ;points to stack in new stack area
jmp stublet
;must be 4 byte aligned
ALIGN 4
mboot:
;multiboot macros
MULTIBOOT_PAGE_ALIGN equ 1<<0
MULTIBOOT_MEMORY_INFO equ 1<<1
MULTIBOOT_HEADER_MAGIC equ 0x1BADB002
MULTIBOOT_HEADER_FLAGS equ MULTIBOOT_PAGE_ALIGN|MULTIBOOT_MEMORY_INFO
MULTIBOOT_CHECKSUM equ -(MULTIBOOT_HEADER_MAGIC + MULTIBOOT_HEADER_FLAGS)
; grub multiboot header/boot signature
dd MULTIBOOT_HEADER_MAGIC
dd MULTIBOOT_HEADER_FLAGS
dd MULTIBOOT_CHECKSUM
;endless loop here, later extern_main and call_main exist before the loop jmp$
stublet:
extern main
call main
jmp $
;area for loading the GDT here
;Service routines (ISRs) here
;definition of BSS section, using stack for now (BSS = uninitialized variables)
SECTION .bss
resb 8192 ;reserves 8KB of memory
_sys_stack:
Linker Script
linker script. The Linker script, which I mentally wrote in
green, because Link, is going to form the triforce of code
with our assembled kernel entry point, main, and screen
compiled C code. They will merge into one bin file with recipe
in link.ld script. This script is space sensitive, when I first
wrote it I left out a space and it gave me an error (more on my
errors later). The GNU linker, ld, is going to be used to run this
show. The link.ld is the the recipe, and ld is the chef, you just
have to tell the chef to start cooking (and what to cook). ld is
standard with Ubuntu, so you can use "man" and "info" to get
more details about it.

My Linker script:
ENTRY(start)
phys = 0x00100000;
SECTIONS
{
.text phys : AT(phys) {
code = .;
*(.text)
*(.rodata)
. = ALIGN(4096);
}
.data : AT(phys + (data - code))
{
data = .;
*(.data)
. = ALIGN(4096);
}
.bss : AT(phys + (bss - code))
{
bss = .;
*(.bss)
. = ALIGN(4096);
}
end = .;
}
Makefile
So, with possibly 3 pieces of code to compile and link, life would be easy if we could just link them within the same step, right? That's exactly what our makefile is going to do; it will run the commands to compile and link all of our code in one swoop. This is where we start to deviate from the tutorial. The 64 bit Ubuntu will assume that you want gcc to compile your C code in x64, which will cause ld to cry because it can't put that x86 kernel entry point with the x64 C code. We must add -m32 to our gcc instructions.Also, due to linux, instead of making a .bat file like we would in windows, we need to make a bash script. It's essentially the same thing: a list of regular commands that runs like a list. In Windows, you can make the batch file a .bat, and it runs. Linux is like an owlbear, it don't care about the extension. When you write your script, include the shebang #! /bin/bash, and then chmod 766 for rwx, rw,rw permissions. This allows it to become executable, and in Ubuntu LTS 14.04, it turns green. The below snippet is my file, called "build", I used the "cat" command to read the file. (In Windows this command is type, or gc in powershell.)

As you can see here, every file that is going to be compiled into my kernel has its own line for compilation, and is listed in the ld command. I also had to add the -m 32 so it knew to compile and link as x86. *Note that you feed the .o, or output files to the ld command. The gcc commands point to a -I./include, which is a folder inside the current working directory named include. You will put any header files in this directory. (system.h).
So it should look similar to this:
So it should look similar to this:
Inside of home/username/kernel:
start.asm, start.o, main.c, main.o, scrn.c, scrn.o, build
Inside of /home/username/kernel/include:
system.h
You can use the linux ls command to view the documents inside of a directory directory.
*Note that some of the files listed above do not yet exist, as the next step is creating main.c, system.h, and scrn.c
C source files
As I mentioned, the next step is creating main.c. Mr. Friesen's version leaves some of the functions blank for you to attempt to write your own code. He also has a solution posted on his site that you can select to view how he wrote them. Personally, I attempted to understand the functions and how and why they did what they did, and then I decided to use his code that was already written. (Training wheels, remember?) Here is where I stress also following the other blog; I think Friesen put in some code to make you figure things out, which is good, but I actually modified that to reflect the code on the second blog. http://www.cs.vu.nl/~herbertb/misc/writingkernels.txt
The C source files are the circulatory system of your kernel, and main.c is at the the heart. The C code tells your kernel what to do and how to do it. It is your kernel.
After you create the C files: main.c, scrn.c, and start.asm, you should be able to get it to boot onto a screen and print some text. However, getting it to compile without errors took a few tries, instead of running the individual nasm and gcc commands on each program individually, I just ran my build file and assumed it would work because I copied and pasted most of the code... This was entirely false due to the environmental differences due to the time gaps and creation of my kernel versus Mr. Freisen's. Not to mention the downloadable main.c had some slight differences from the main.c showing on the screen.
After you create the C files: main.c, scrn.c, and start.asm, you should be able to get it to boot onto a screen and print some text. However, getting it to compile without errors took a few tries, instead of running the individual nasm and gcc commands on each program individually, I just ran my build file and assumed it would work because I copied and pasted most of the code... This was entirely false due to the environmental differences due to the time gaps and creation of my kernel versus Mr. Freisen's. Not to mention the downloadable main.c had some slight differences from the main.c showing on the screen.
Below shows a tidbit of the troubleshooting I had to preform, on my first attempt I had an entire screen of errors and nothing compiled. Whoa, what the hell? there was a guide? I had training wheels! You can't tip over a bike with training wheels?!
The Bike tipped over. I scraped my knees. and probably lost a tooth.
Here is the modified, functional code for main.c:
#include <system.h>
/* You will need to code these up yourself! */
unsigned char *memcpy(unsigned char *dest, const unsigned char *src, int count)
{
const char *sp = (const char *)src;
char *dp = (char *)dest;
for (; count !=0; count--) *dp++ = *sp++;
return dest;
}
unsigned char *memset(unsigned char *dest, unsigned char val, int count)
{
char *temp = (char *)dest;
for(;count !=0; count--) *temp++ = val;
return dest;
}
unsigned short *memsetw(unsigned short *dest, unsigned short val, int count)
{
unsigned short *temp = (unsigned short *)dest;
for( ; count !=0; count--) *temp++ = val;
return dest;
}
size_t strlen(const char *str)
{
size_t retval;
for(retval =0; *str != '\0'; str++) retval++;
return retval;
}
/* We will use this later on for reading from the I/O ports to get data
* from devices such as the keyboard. We are using what is called
* 'inline assembly' in these routines to actually do the work */
unsigned char inportb (unsigned short _port)
{
unsigned char rv;
__asm__ __volatile__ ("inb %1, %0" : "=a" (rv) : "dN" (_port));
return rv;
}
/* We will use this to write to I/O ports to send bytes to devices. This
* will be used in the next tutorial for changing the textmode cursor
* position. Again, we use some inline assembly for the stuff that simply
* cannot be done in C */
void outportb (unsigned short _port, unsigned char _data)
{
__asm__ __volatile__ ("outb %1, %0" : : "dN" (_port), "a" (_data));
}
/* This is a very simple main() function. All it does is sit in an
* infinite loop. This will be like our 'idle' loop */
void main()
{
/* You would add commands after here */
// int i;
// gdt_install();
// idt_install();
// isrs_install();
// irq_install();
// init_video();
// timer_install();
// keyboard_install();
// __asm__ __volatile__ ("sti");
init_video();
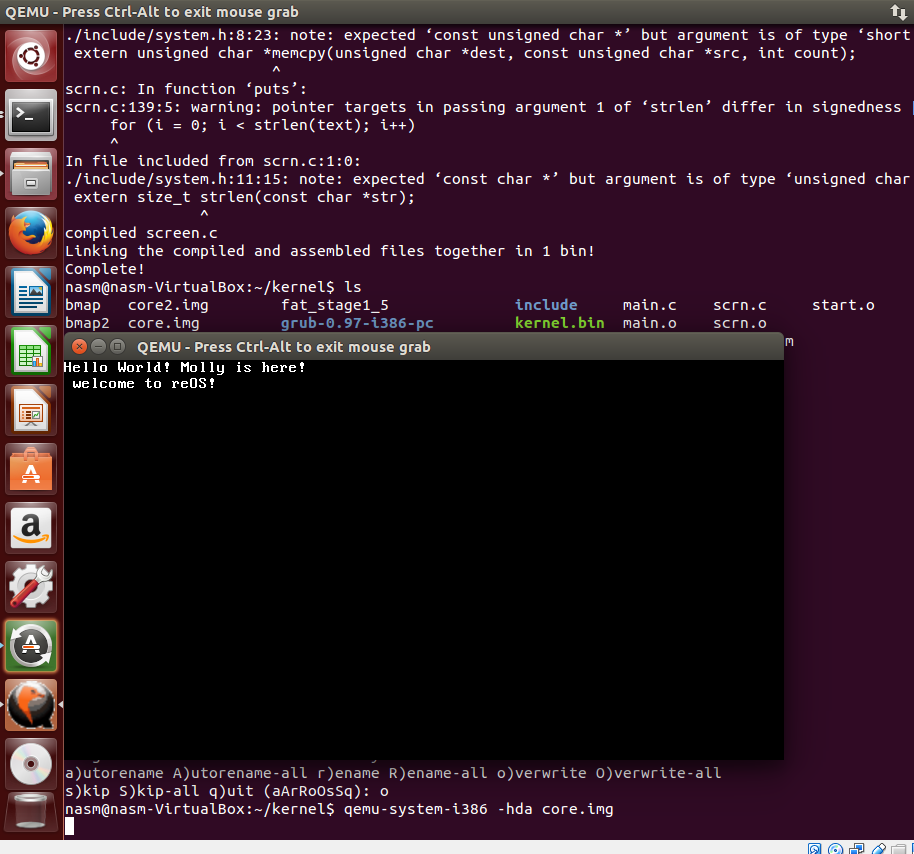
puts("Hello World! Molly is here!\n welcome to reOS!\n");
/* ...and leave this loop in. There is an endless loop in
* 'start.asm' also, if you accidentally delete this next line */
//i = 10 / 0;
// putch(i);
for (;;);
}
Here is the modified, functional code for scrn.c:
#include <system.h>
/* These define our textpointer, our background and foreground
* colors (attributes), and x and y cursor coordinates */
unsigned short *textmemptr;
int attrib = 0x0F;
int csr_x = 0, csr_y = 0;
/* Scrolls the screen */
void scroll(void)
{
unsigned blank, temp;
/* A blank is defined as a space... we need to give it
* backcolor too */
blank = 0x20 | (attrib << 8);
/* Row 25 is the end, this means we need to scroll up */
if(csr_y >= 25)
{
/* Move the current text chunk that makes up the screen
* back in the buffer by a line */
temp = csr_y - 25 + 1;
memcpy (textmemptr, textmemptr + temp * 80, (25 - temp) * 80 * 2);
/* Finally, we set the chunk of memory that occupies
* the last line of text to our 'blank' character */
memsetw (textmemptr + (25 - temp) * 80, blank, 80);
csr_y = 25 - 1;
}
}
/* Updates the hardware cursor: the little blinking line
* on the screen under the last character pressed! */
void move_csr(void)
{
unsigned temp;
/* The equation for finding the index in a linear
* chunk of memory can be represented by:
* Index = [(y * width) + x] */
temp = csr_y * 80 + csr_x;
/* This sends a command to indicies 14 and 15 in the
* CRT Control Register of the VGA controller. These
* are the high and low bytes of the index that show
* where the hardware cursor is to be 'blinking'. To
* learn more, you should look up some VGA specific
* programming documents. A great start to graphics:
* http://www.brackeen.com/home/vga */
outportb(0x3D4, 14);
outportb(0x3D5, temp >> 8);
outportb(0x3D4, 15);
outportb(0x3D5, temp);
}
/* Clears the screen */
void cls()
{
unsigned blank;
int i;
/* Again, we need the 'short' that will be used to
* represent a space with color */
blank = 0x20 | (attrib << 8);
/* Sets the entire screen to spaces in our current
* color */
for(i = 0; i < 25; i++)
memsetw (textmemptr + i * 80, blank, 80);
/* Update out virtual cursor, and then move the
* hardware cursor */
csr_x = 0;
csr_y = 0;
move_csr();
}
/* Puts a single character on the screen */
void putch(unsigned char c)
{
unsigned short *where;
unsigned att = attrib << 8;
/* Handle a backspace, by moving the cursor back one space */
if(c == 0x08)
{
if(csr_x != 0) csr_x--;
}
/* Handles a tab by incrementing the cursor's x, but only
* to a point that will make it divisible by 8 */
else if(c == 0x09)
{
csr_x = (csr_x + 8) & ~(8 - 1);
}
/* Handles a 'Carriage Return', which simply brings the
* cursor back to the margin */
else if(c == '\r')
{
csr_x = 0;
}
/* We handle our newlines the way DOS and the BIOS do: we
* treat it as if a 'CR' was also there, so we bring the
* cursor to the margin and we increment the 'y' value */
else if(c == '\n')
{
csr_x = 0;
csr_y++;
}
/* Any character greater than and including a space, is a
* printable character. The equation for finding the index
* in a linear chunk of memory can be represented by:
* Index = [(y * width) + x] */
else if(c >= ' ')
{
where = textmemptr + (csr_y * 80 + csr_x);
*where = c | att; /* Character AND attributes: color */
csr_x++;
}
/* If the cursor has reached the edge of the screen's width, we
* insert a new line in there */
if(csr_x >= 80)
{
csr_x = 0;
csr_y++;
}
/* Scroll the screen if needed, and finally move the cursor */
scroll();
move_csr();
}
/* Uses the above routine to output a string... */
void puts(unsigned char *text)
{
int i;
for (i = 0; i < strlen(text); i++)
{
putch(text[i]);
}
}
/* Sets the forecolor and backcolor that we will use */
void settextcolor(unsigned char forecolor, unsigned char backcolor)
{
/* Top 4 bytes are the background, bottom 4 bytes
* are the foreground color */
attrib = (backcolor << 4) | (forecolor & 0x0F);
}
/* Sets our text-mode VGA pointer, then clears the screen for us */
void init_video(void)
{
textmemptr = (unsigned short *)0xB8000;
cls();
}
Here is the modified, functional code for system.h
#ifndef __SYSTEM_H
#define __SYSTEM_H
#define _SIZE_T
typedef unsigned int size_t;
/* MAIN.C */
extern unsigned char *memcpy(unsigned char *dest, const unsigned char *src, int count);
extern unsigned char *memset(unsigned char *dest, unsigned char val, int count);
extern unsigned short *memsetw(unsigned short *dest, unsigned short val, int count);
extern size_t strlen(const char *str);
extern unsigned char inportb (unsigned short _port);
extern void outportb (unsigned short _port, unsigned char _data);
//scrn.c
extern void cls();
extern void putch(unsigned char c);
extern void puts(unsigned char *str);
extern void settextcolor(unsigned char forecolor, unsigned char backcolor);
extern void init_video();
#endif
Compiling and linking
The only way to handle the myriad of errors was to break it into smaller chunks, and get each individual program to compile without issue, then move on to the next.
size_t
I'm going to start with the size_t error. I had never heard of this before. I had to do some research to realize it was a unsigned integer often included in the stddef.h or stdlib.h.
I'm going to start with the size_t error. I had never heard of this before. I had to do some research to realize it was a unsigned integer often included in the stddef.h or stdlib.h.
The error read:
main.c:26:1: error: unknown type name ‘size_t’
main.c:26:1: error: unknown type name ‘size_t’
size_t strlen(const char *str)
^
main.c: In function ‘strlen’:
main.c:28:2: error: unknown type name ‘size_t’
size_t retval;
^
Once I learned what size_t was and where it was included, I realized my system.h did not have that in it, so I figured I would steal it from stdlib.h. I went into the /usr/include directory, where the majority of C headers reside, and tried to locate it by using grep size_t stdlib.h.

In the output, I did not see anything about a size_t in stdlib, but there is a really helpful comment at the top that said to get size_t from stddef.h.... Easy, right? I'll just grep for it in stddef.h.. As you can see above, there isn't a stddef.h in /usr/include!
Dafaq? Well, where is it? I AM SO BAD AT HIDE AND GO SEEK.
I enlisted in the aide of locate to try to find it.
Finally found it, inside of /usr/lib/syslinux/com32/include/bitsize/stddef.h and decided to expand my grep query by using grep -a5 -b5 size_t. This allows me to see five lines before and after the line I want. Looking at this, I made a hypothesis that I needed to add both #define _SIZE_T and typedef unsigned int size_t; to my system.h file.
*Note that grep -i size_t would have worked well here, because it would ignore the case, but looking at the lines around it worked out just fine for me

Seeing this only validated what the internet said about size_t being an unsigned int, and that I probably could have changed the size_t to unsigned int in my main.c, but I figured it'd be handy to have it available.

My proposed remediation seems to have worked, because I no longer had gcc complaining about size_t, but I did have some issues with my strlen function.

Implicit declaration
The next error was an implicit declaration error:


The next item in main.c is the puts warning. I did some quick googling to tell me that I put unsigned characters (0-255) in the protocol, but my puts function is using regular characters (0-127). This actually doesn't seem like a big deal because the regular chars will fall into the boundary of the unsigned characters. I opted to move onward, and compile C. (It was just a warning anyway.)

A few more issues: I had missed a semicolon in scrn.c, and then got a few errors linking about architecture differences, which I forewarned you about earlier, so you shouldn't be seeing them. I also forgot to include a chunk of code in my linker.ld. Below is where I got the error that led me to use gcc in 32 bit mode. I forgot the .bss chunk of code in my link.ld script, and I added bss= instead of bss = and got another error. (I warned you about spacing in that script above, so hopefully you won't run into that.)

Once I made the resolved those issues, viola!! Below it compiled without the errors on the linker, and a few warnings for the C code.

Next Steps... Getting it to boot!
Now I have a whole new beast to deal with, the Grand Unified Boot Loader, or GRUB....I originally started following:
www.cs.vu.nl/~herbertb/misc/writingkernels.txt as a start for building my grub based boot loader for this new kernel. Turns out, I decided that when I was troubleshooting my booting issues, I compared the code to his; which caused a few modifications reflected in the above post in cyan.
I already had a few minor issues... Ubuntu 14.04 LTS used grub2, not legacy grub, so I had to acquire it. (I didn't have the required files to steal from my own /boot/grub/* files)... anyway, I got legacy grub from here: ftp://alpha.gnu.org/gnu/grub/
I followed the guide mentioned above to get this working.
I unzipped it (you can extract via the GUI or tar -xvf), and my home/user/kernel directory looks like this: (some of these extras aren't necessary, I just made some to troubleshoot)

So here's what the second guide said about putting it all together in the core.img to make it boot:
I had attempted to follow it word for word, but the drive c: was already declared in /etc/mtools.conf configuration file, and it caused issues when trying to create it or copy things to it.

I highly encourage you to cat /etc/mtools.conf and make sure the drive letter is not already included. I picked the letter j: for my drive because I didn't see anything using it.
Declare where to find your partition.. make sure you are inside your /home/user/kernel directory:
echo "drive j: file=\"`pwd`/core.img\" partition=1" > ~/.mtoolsrc
create your partition:
dd if=/dev/zero of=core.img count=088704 bs=512
mpartition -I j:
mpartition -c -t 88 -h 16 -s 63 j:
mformat j:
mmd j:/boot
mmd j:/boot/grub
move your files over to your new partition:
*Note the location of grub's stages from our extracted tarball
*Note the location of grub's stages from our extracted tarball
mcopy grub-0.97-i386-pc/boot/grub/stage1 j:/boot/grub
mcopy grub-0.97-i386-pc/boot/grub/stage2 j:/boot/grub
mcopy grub-0.97-i386-pc/boot/grub/fat_stage1_5 j:/boot/grub
create a bmap to specify your device map:
echo "(hd0) core.img" > bmap

printf "geometry (hd0) 88 16 63 \n root (hd0,0) \n setup (hd0)\n" | /usr/sbin/grub --device-map=bmap  --batch
*note the above is one single line
Create a menu.lst file (the configuration file that GRUB relies on to load). You can use nano, as previously mentioned.
Mine is shown below:
serial --unit=0 --stop=1 --speed=115200 --parity=no --word=8
terminal --timeout=0 serial console
root= (hd0,0)
default 0
timeout = 0
title= mykernel
kernel= /boot/grub/kernel.bin
# module=/boot/grub/additional_modules
Copy the lst file and your binary kernel over to your new partition.
mcopy menu.lst j:/boot/grub/
mcopy kernel.bin j:/boot/grub/
then use qemu to boot: (note the second guide I'm following uses an older version of qemu... for the newer version like is on Ubuntu 14.04 LTS, please use the following)
qemu-system-i386 -hda core.img
and Hopefully you don't run into as many issues as I did, because I have posted the working code here.
If you do mess something up, and you have to recompile your kernel.bin, use the same mcopy line as before, but select the lowercase "o" to overwrite the previous.
ISSUES I ran into:
I had it stuck on the grub is loading... phase for quite a while, then I did a solid day or two of research on how GRUB worked, modified the menu.lst, and realized that it still did not work. Then I got the whole screen was blinking, in the grub loading... And I was like, is it rebooting? So I thought maybe that jmp $ I put in my start.asm was getting hit non-stop, and looping, but nothing was loading because there was an issue with my start.asm.... Which would mean there was absolutely nothing wrong with the grub implementation and that I wasted a day and some change reading technical guides for my own pleasure.
I moved onto the start.asm script, which I changed to match the one in the second blog: I made it an ELF file, removed the kludge lines... re-ran my build script and copied it over to my core.img file. Then I was able to see my "Hello world, Molly is here, welcome to ReOS!!" However, the screen blinked yet again, it went from printing my string back to boot back to printing my screen. Another start.asm issue? Surely not, because my kernel was loading...
I determined the problem must be in main.c, because there is a loop there that is supposed to keep main running infinitely, and not cause the system to reload like that. It didn't seem like it was working. Weird. I spotted some inline assembly, __volatile__ something or other inside of main that did not match main from the second tutorial... I commented this line out (see above main.c in cyan) and I got it working! yay!
That is the first checkpoint before the GDT, IDT, and more get added.
Onward to the next steps!
This was an incredible pain in the ass, and I have so much respect for Linus Torvalds, and the others who have worked on open source OSes and kernel dev... It's amazing to know the extreme amount of work put into it and yet they distribute it for free! Special shout out to the people who created those kernel dev tutorials, without them as a guideline, I would have been really, really lost. I learned a lot of new things about C, assembly, compiling & linking, GRUB, and more.
Subscribe to:
Posts (Atom)